Wednesday, May 13, 2009

TestNG with Eclipse

After exploring both JUnit and TestNG, I finally decided to go with the TestNG. And I moved on to eclipse IDE aswell, as it will provide ease in writing and running the testcases ( as compared to the dos prompt and notepad). The following blog will show you how to install TestNG plug-in in eclipse and how to create and run testcase.
Install TestNg on Eclipse
Create Testcase
Run the Testcase


Installing TestNG on Eclipse
follow the simple steps below to install the TestNG plug-in on the eclipse IDE.
  • Open the Install/Update window from Help->Software Updates->Find and Install
  • Click on the radio button "Search for new feature to install" and click "Next" button
  • Click on the "New remote site..." and supply name as "TestNG" and URL as "http://beust.com/eclipse" and click on "OK"
  • Make sure the TestNG is checked and click on the "Finish" Button
  • Now follow the other steps and TestNG will be installed.


Create TestCase
To create the testcase in the eclipse you also need to create a project and import some require JAR files. So let's being with that.
  • Create the project
    Now to begin with the the eclipse you need to first create the project. it will contain all the packages and packages will contain all necessary Java files (testcases ) and configuration files ( xml files )
    So just navigate to the file->new->Java Project. Give it some appropriate name and create it.
  • Import required JAR files
    Now to support the testNG framework and selenium API you need to import their jar files.
    So just click on the Libraries tab and then click on the "Add External Jars.." import the following libraries from you hard disk.
    selenium-java-client-driver.jar
    selenium-server.jar
    testng-5.9-jdk15.jar

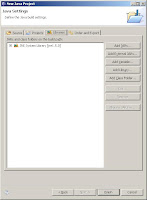
    If you have already created the project. Just open the project properties dialog box from Project->Properties.
    Now click on the "Java Build Path" and then click on the "Libraries" tab and import all the libraries mentioned above.

  • Write testcase.
    Now we need to create a new class file and need to write down the testcase. Just Right click on your project and click on the new->Class. Provide the name as google in the dialog box.
    Now just replace the code the Google.java file with the below code.
Google.java
import static org.testng.AssertJUnit.*;
import org.testng.annotations.*;
import com.thoughtworks.selenium.*;

public class Google {
private Selenium selenium;

@BeforeClass
public void startSelenium() {
selenium = new DefaultSelenium("localhost", 4444, "*chrome", "http://www.google.com");
selenium.start();
selenium.open("http://www.google.com");
}

@AfterClass(alwaysRun=true)
public void stopSelenium() {
this.selenium.stop();
}

@Test(groups="search")
public void googling() {
try {
selenium.type("name=q", "qtp-help.blogspot.com");
selenium.click("name=btnG");
selenium.waitForPageToLoad("60000");
assertTrue(selenium.isTextPresent("qtp-help.blogspot.com"));

} catch (SeleniumException e) {
fail(e.getMessage());
}
}
}


Run the Testcases.
Now you have created the testcases. But before we run it. Let's start the selenium server.
Now to run the testcase right click on the project and then click on the Run As->Open Run Dialog box
Now right click on the TestNg in the left pannel and click "New". Now you need to create a run configuration based on how you would like to run you testcases(s).

Here you will find five option to run your testcases(s). Let's see one by one what all these options are.
First browse your project by clicking on the browse button.

Class: If you will select this, all the testcases under the selected class will run on b y one.

Method: Choose this option if you want only particular testcase to run.


Group: This option will allows you to run the Groups of the testcases if you have mention that in your class. You can browse all the Groups in the class and can choose particular group to run.


For All the above option a temporary config will be created in you project folder.
Package:Choose this option if you want to run all the classes inside a package.
Suite: Use this option if you want to run any of the testsuit from your class. However to use this you need to create the TestNG configuration file.

Tuesday, May 5, 2009

TestNG

TestNG is yet an another framework to work in JAVA. Both looks almost same on the surface but there are vast differences between their frameworks. JUnit is designed to do the unit testing, and it's doing it very well while the TestNG has designed to do the higher level thing. So there are many features available in the TestNG that you will not find in JUnit.

Before we checkout the features provided by the TestNG, let's take a look at how to make the simple testcase using TestNG and run it.


TestNG Annotations
Following are some of the annotations we have used in our example
@BeforeClass: The annotated method will be run before the first test method in the current class is invoked.
@AfterClass: The annotated method will be run after all the test methods in the current class have been run.
@Parameters: Describes how to pass parameters to a @Test method.
@Test: Marks a class or a method as part of the test.

If you look at the @BeforeClass and @AfterClass annotation they are same as of JUnit, the only difference is the method annoted with @BeforeClass or @AfterClass need not to be static as compared to the JUnit.

TestNG Testcase

Google.java

import static org.testng.AssertJUnit.*;
import org.testng.annotations.*;
import com.thoughtworks.selenium.*;

public class Google {

private Selenium selenium;

@BeforeClass
@Parameters({"selenium.host","selenium.port","selenium.browser","selenium.url"})
public void startSelenium(String host, String port, String browser, String url) {

this.selenium = new DefaultSelenium(host, Integer.parseInt(port), browser, url);
this.selenium.start();
this.selenium.open(url);
}

@AfterClass(alwaysRun=true)
public void stopSelenium() {
this.selenium.stop();
}

@Test
@Parameters({"search","expected"})
public void googling(String search, String expected) {
try {
selenium.type("name=q", search);
selenium.click("name=btnG");
selenium.waitForPageToLoad("60000");
assertTrue(selenium.isTextPresent(expected));

} catch (SeleniumException e) {
fail(e.getMessage());
}
}
}


Configuration file.
Configuration file is a normal xml file. which defines all the test cases, test suits, their names,all the parameters and their values and many more things.

Let's look at configuraion file for the above testcase
GoogleTestng.xml


Set CLASSPATH
Before you run your testcase from the command line, You need to set the classpath.
Find out the file "testng-5.9-jdk15.jar" and set it's path in classpath variable.
The name of the file may differ depending upon the version of TestNG you are using.
To set the class path do as follows:
1. just right click on My Computer icon, Click on the Advance tab, then click on the Environment Button.
2. In the System Variable double click on the CLASSPATH.
3. In the variable value add the full path of your "testng-5.9-jdk15.jar" file.
Run the Testcase.
  • Make sure that the Selenium server is running.
  • Save the above Google.java file at your desired location
  • Compile the file using the following command on the shell prompt.
    javac Google.java
  • Run the file using the following command on the shell prompt.
    java org.testng.TestNG GoogleTestng.xml
  • Use the following command to see the result.
    start test-output\index.html

Once you will run the testcase on more interesting thing you will find about the TestNG, the reporting. TestNg has built in primary reporting facility which will let you know how many test cases from the particular test suit has run, how many of then passed and how many of them failed.

Monday, May 4, 2009

JUnit Parameterization

Now say you need to run the same test case for the multiple values. you can do this with the help of the parametrization.

JUnit 4 has changed the whole way you do the parametrization. it has introduced a special runner called Parameterized. It allows you to run the same test(s) with different datasets.

Now let's go step by step to make the test case parametrized ( data driven )
Use Parameterized Runner.
If you wanted to make any test case parameterized ( Data Driven ) you need to make it's whole class to run using Parameterized Runner.
This will be done with the help of the @RunWith annotation. Just add the following line before the class.
@RunWith(value=Parameterized.class)

Make Dataset
Now you need to have dataset with all input values and expected output values. Here I have used two dimension array with one column as (input) value and other column as expected (output).
Now every testcase ( method with annotation @Test) will run as many times as the number of rows in the dataset (array).

Now let's move to the example
Example
The example below will do the following task
1. Navigate to the Google.co.in Site.
2. For all the available dataset it will verify the factorial using google calculator.

import com.thoughtworks.selenium.*;

import static org.junit.Assert.assertEquals;
import static org.junit.Assert.assertTrue;

import org.junit.runner.RunWith;
import org.junit.runners.Parameterized;
import org.junit.runners.Parameterized.Parameters;
import org.junit.*;

import java.util.regex.Pattern;
//require for the collection class
import java.util.*;

@RunWith(value=Parameterized.class)
public class parameterization {

private static DefaultSelenium selenium;
private long expected;
private int value;

@BeforeClass
public static void init() /* throws Exception */ {
selenium = new DefaultSelenium("localhost", 4444, "*chrome","http://google.com");
selenium.start();
}

@Parameters
public static Collection data() {
return Arrays.asList( new Object[][] {
{ 1, 0 }, // expected, value
{ 1, 1 },
{ 2, 2 },
{ 24, 4 },
{ 5041, 7 },//wrong expected
});
}

public parameterization(long expected, int value) {
this.expected = expected;
this.value = value;
}
@Test
public void firstTest() throws Exception {

selenium.open("/");
selenium.type("q", value+"!=");
selenium.click("btnG");
selenium.waitForPageToLoad("30000");

String text = selenium.getText("//div[@id='res']/table[1]/tbody/tr[1]/td[3]/h2/b");
//to remove whitespaces
text= text.replace(" ","");
// will verify the text
assertEquals(value+"!="+expected,text);

}
}
If you will look at the above example you will find out that the init() method which is used to open the firefox browser and to navigate to google.co.in site has marked annotation @BeforeClass rather then @Before.
This is because we need site to be opened for all the testcases.

The array which we have used is static. This is because we want it to be same for all the testcase. If it will not be static a new array will be created for the number of nows in the column. and so every test will get the same value, first row.

The another things is when you will run the last test case will show as fail. This is because we have put its expected value in the dataset as 5041 which is wrong. This is just to verify that the assert statement is working correctly.

Saturday, May 2, 2009

Junit 4

Recently I was learning selenium with JUnit. I had bit prior experience with the JUnit 3 so it didn't take much time to setup and run the test case. But then After I decided to take a look at the JUnit 4. And believe me guys it is far better then it's ancestors.So let's go step by step with Junit4.

What's new in JUnitt4 ?

JUnit Annotations

Editing test case

Running test case


So what's new in the JUnit 4 ??
JUnit 4 has introduced the annotation which is supported by JAVA 5, same as TestNG. And that has added much of the flexibility in writing the test cases.

Now you do not need to:
  • Write down the test cases name as starting with test.
  • Extend you test case
  • Have setUp() or tearDown() methods
  • add any main or suit() methods in the test case.

JUnit Annotations:
take a look at some of the frequently used JUnit annotations while writing test cases.

  • @Test: Marks the method as the test case.
  • @Before: Marks the method to execute before each and every test case. Same as setUP()
  • @After : Marks the method to execute after each and every test case. Same as tearDown()
  • @BeforeCalass: Marks the method to execute before all the test cases. Used to do the initilization which is command for all the test cases.
  • @AfterClass: Marks the method to execute after all the test cases executed. Used to do the system wide cleanup.


The thing to take care here is, If a method has annotation @BeforeClass or @AfterClass it has to be static. And that means all the variable inside that also has to be static.

Converting Selenium test case to JUnit 4.

Take a look at the following code, which has been recorded through selenium and exported in java.
package com.example.tests;

import com.thoughtworks.selenium.*;
import java.util.regex.Pattern;

public class NewTest extends SeleneseTestCase {
public void setUp() throws Exception {
setUp("http://www.google.com/", "*chrome");
}
public void testNew() throws Exception {
selenium.open("/");
selenium.type("q", "selenium IDE");
selenium.click("btnG");
selenium.waitForPageToLoad("30000");
selenium.click("link=Selenium IDE");
selenium.waitForPageToLoad("30000");
}
}

Now to convert this into the JUnit 4 testcase you need to perform the following things
  • Remove first line starting with Package or comment it.
  • add the following import statement
    import org.junit.*;
  • Remove the setUp() method.
  • Do no extend the class, Remove the "extends SeleneseTestCase" string
  • Now you need to create the object of the DefaultSelenium class as we have removed the extend statement and setUp() method. Add the following code in you class for that.

    private DefaultSelenium selenium;
    @Before
    Public void init() throws Exception {
    selenium = new DefaultSelenium("localhost", 4444, "*chrome","http://google.com");
    selenium.start();
    }

The Exported code will look like as below after editing it.
import com.thoughtworks.selenium.*;
import java.util.regex.Pattern;
import org.junit.*;

public class GoogleSearch {

private DefaultSelenium selenium;

@Before
public void init() throws Exception {
selenium = new DefaultSelenium("localhost", 4444, "*chrome","http://google.com");
selenium.start();
}

@Test
public void firstTest() throws Exception {

selenium.open("/");
selenium.type("q", "selenium IDE");
selenium.click("btnG");
selenium.waitForPageToLoad("30000");
selenium.click("link=Selenium IDE");
selenium.waitForPageToLoad("30000");
}
}
  • Make sure the file name and the class name is same.
  • Save the file and compile it with following code.

    javac path/filename.java

    If everything goes fine up to the point code will compile without any error.


Run the testcase
Now before you run the test case make sure that the Selenium server has started if not please start it.

Now run your test case by following command on the shell prompt.

java java org.junit.runner.JUnitCore classname